FAQs
Updating drivers manually for LabelWriter ® on Windows
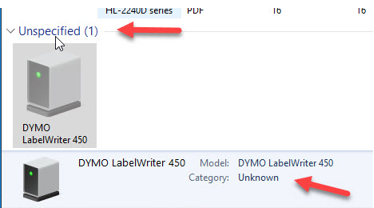
If the LabelWriter appears under unspecified on Windows in Devices and Printers, usually the computer has not identified that device as a printer yet.
- Go to Control Panel>Hardware and Sound>Device Manager.
- Select View>Show Hidden Devices
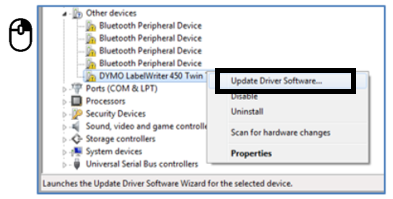
- The LabelWriter should be listed under Other Devices, Printers or Software category.
- Right-click on LabelWriter and select Update Driver Software….
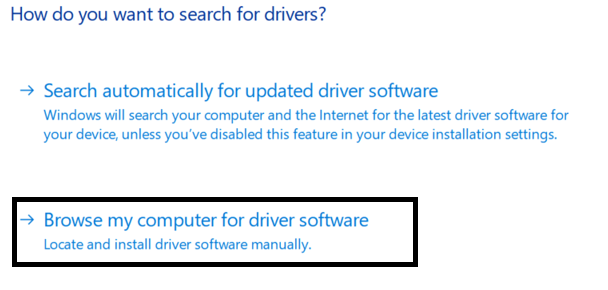
- In the next window, pick Browse my computer for driver software.
- Click the Browse… button and point to one of the folder locations depending on the DYMO software you are using:
A. DYMO Connect:
For 64-bit systems: C:\Program Files (x86)\DYMO\DYMO Connect\Drivers For 32-bit systems: C:\Program Files\DYMO\DYMO Connect\Drivers
B. DYMO Label v.8:
For 64-bit systems: C:\Program Files (x86)\DYMO\DYMO Label Software\Drivers For 32-bit systems: C:\Program Files\DYMO\DYMO Label Software\Drivers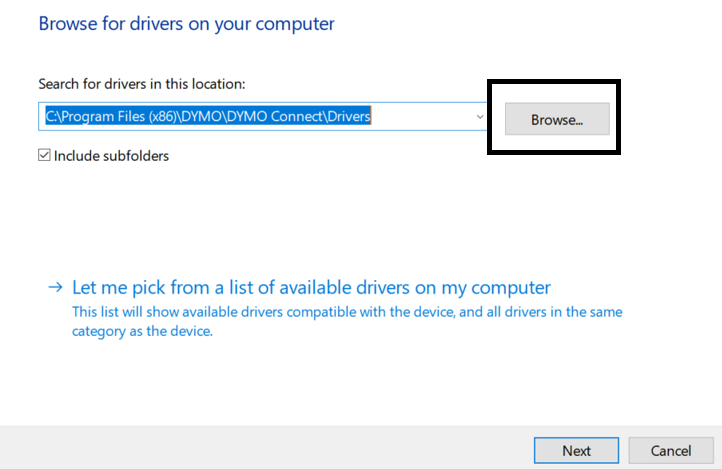
- Click ‘Next’ and you should receive a notification that Windows has successfully performed the task. If you are receiving any error messages at this point, please contact us.
- On some versions of Windows the printer will still show the DYMO under Unspecified even though in Device Manager it appears under Printers. However, you should still be able to print. It’s a Windows glitch, and restarting Windows often resolves that.
LabelWriter Excessive Feeding
If you are experiencing excessive feed of labels from one of the DYMO LabelWriter printers, please follow the next steps:
Step 1. Make sure to use DYMO genuine labels as they were tested with our devices and provide you with the best printing output.
1). DYMO Genuine labels come in the packages shown below.

Step 2. Prepare DYMO LabelWriter printer for the troubleshooting
2) Disconnect the device from USB cable.
3) Open label compartment.
4) Using the grey leaver on the left-hand side, remove labels out form the feeding area.
5) Take the spool out of the machine.
Step 3. Clean the printer following the next steps:
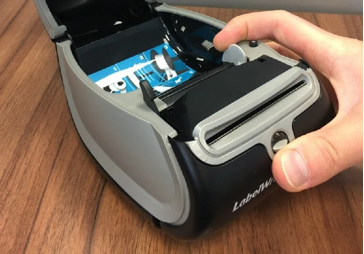
1. Open the lid of the printer.
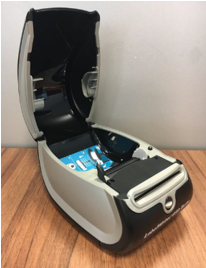
2. Grip top part of the front cover and lift it up.
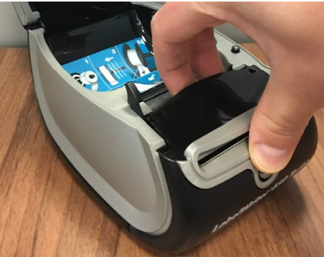
3. Remove the cover by pulling it towards you.
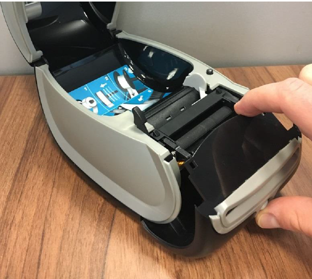
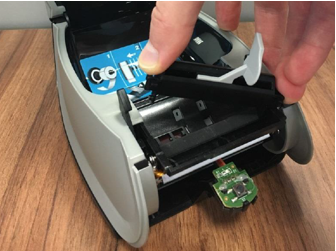
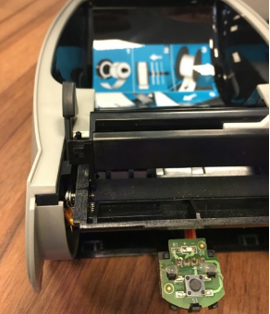
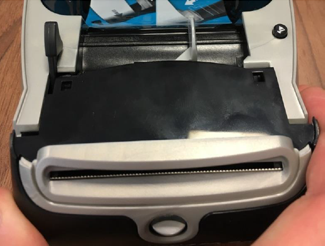
4. Pull up the label guide.
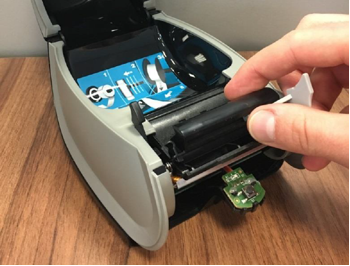
5. Squeeze the label guide on its sides and remove the mechanism.
6. Cut the jammed label with a cutter. Be careful not to damage the print roller.
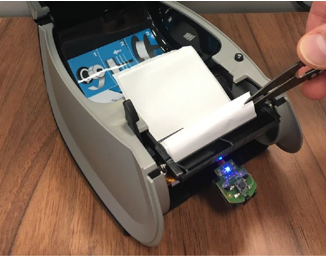
7. Cut the label into pieces so that is easier to remove them.
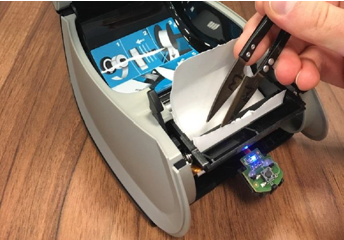
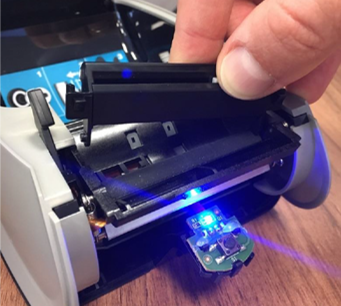
8. Continue until the print roller is visible.
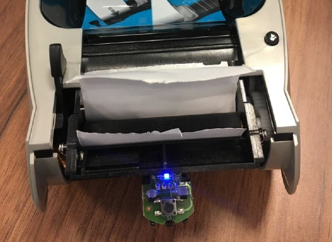
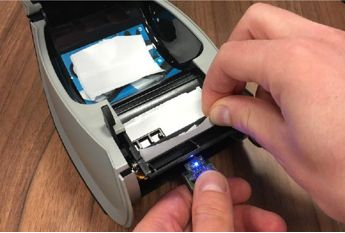
9. Connect power supply to the printer. Once the power is on, press the form feed button and gently pull out label pieces. Continue until all pieces of label are removed.
10. Put back the label guide mechanism.
11. Insert the hinge into the hole on the right side of the printer.
12. Insert the hinge into the hole on the left side of the printer until you hear a click.
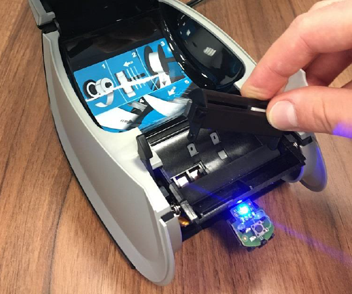
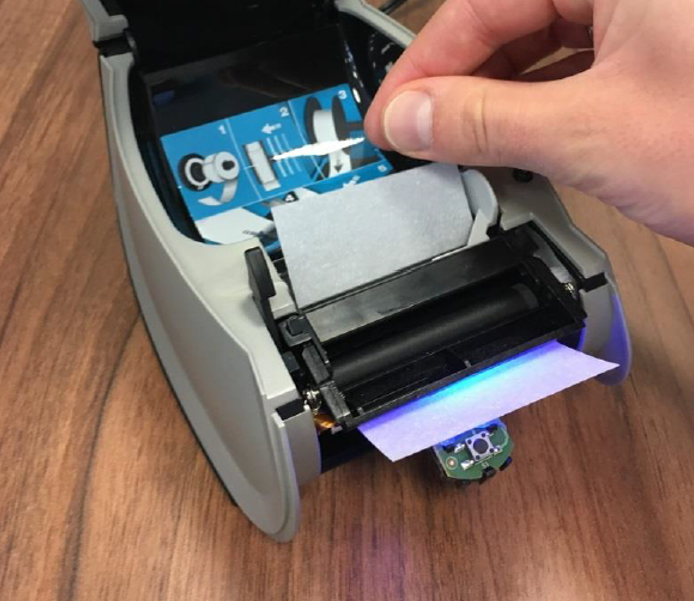
13. While the front cover is removed, use the cleaning card or a business card moistened with isopropyl alcohol and feed it through the printer at least 10 times. The isopropyl alcohol will remove any adhesive leftovers that may remain on the roller or the printhead.
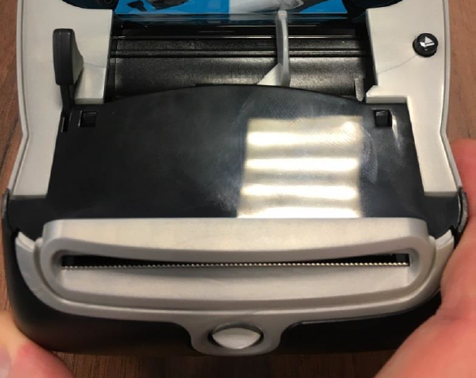
14. If both the print roller and printhead are clean, take the front panel put it back on the printer.
15. Make sure that attachment points are correctly aligned.
16. Push the top of the front panel towards the printer until you hear a click on both sides.
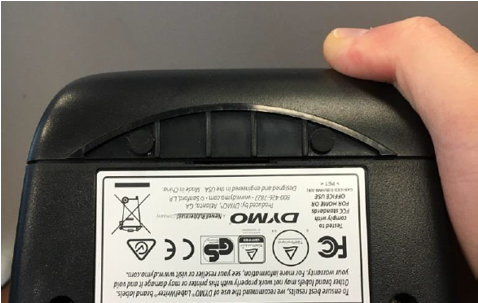
17. Check the bottom of the printer to see if the front panel is correctly aligned. Push it towards the printer until the panel is tightly attached.
Step 3. Follow the guide provided via the following link to insert labels correctly: How-to-insert-Insert-Labels-Instructions
Step 4. Try printing a label out
1) Connect the device back to the USB cord
2) Try printing using DYMO software
LabelWriter 450 series or LabelWriter 4XL misaligned print from 3rd party software (eg. Shopify/Amazon/PayPal etc).
In order to solve the issue, please follow the steps below:
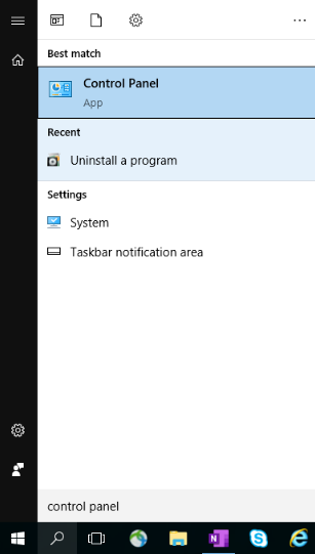
1. Make sure that you have the latest version of our DYMO Software installed on your computer. To check that, please navigate to: Control Panel\Programs\Programs and Features
You should see one of the following:
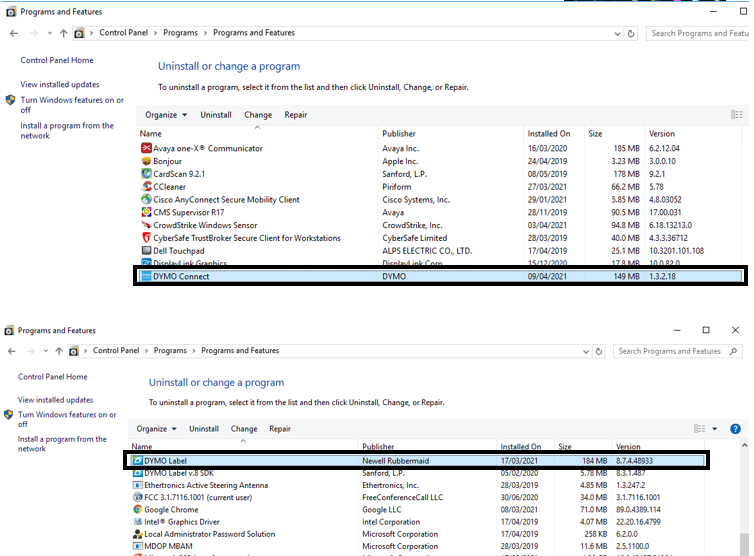
2. If your Software version is different than one of those listed above, please update your software by clicking on one of the following links: for DYMO Connect Software, click HERE, for DYMO Label Software, click HERE. If you have the same version as shown above, proceed with the next steps.
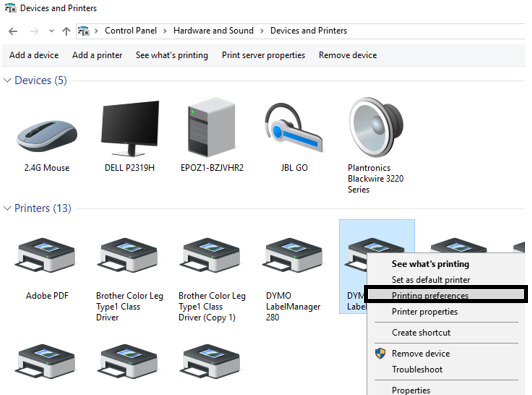
3. Navigate to Control Panel\Hardware and Sound\Devices and Printers. Find your DYMO LabelWriter and right click on it and select Printing Preferences.
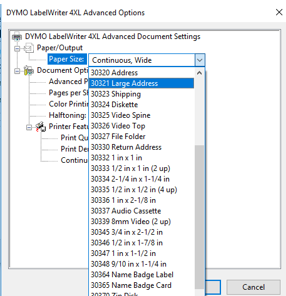
4.Go to Advanced.
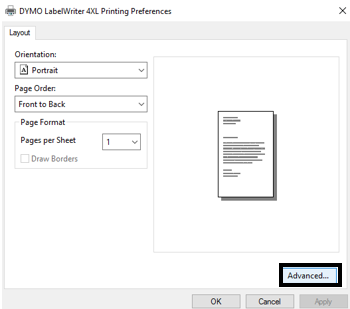
5. From the drop down list, please select the same label size that you have got in your printer, click OK and Apply.
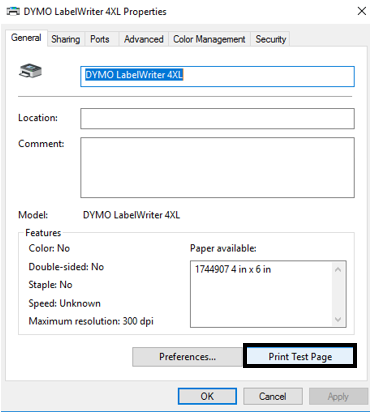
6. Try to print a Windows Test Page. Right click on the printer in Devices and Printers, select Printer Properties and then press the button: Print Test Page.
7. To double check if the alignment is correct please open your DYMO Software, select the correct label size and print a sample label.
8. If the test page and the sample label were printed out correctly, please go to your 3rd party application and try printing. If they were not printed out correctly, please double check if the type of labels selected in step 5 and in your DYMO Software are the same as the labels in your printer.
If after following all the above steps you still experience misaligned print from 3rd party application, please contact their support as the issue is most probably related to the printer settings in that application.
Reinstalling LabelWriter® on Windows
Following guide Solution for the following issues:
- Error – Printing’ message.
- LabelWriter not printing.
- ‘Error - Out of Paper’ message.
Please follow steps below to reinstall you LabelWriter:
1. Remove both the power and the USB cable from the back of your LabelWriter.
2. Remove the labels from the feed path (use the black release lever located on the left-hand side).
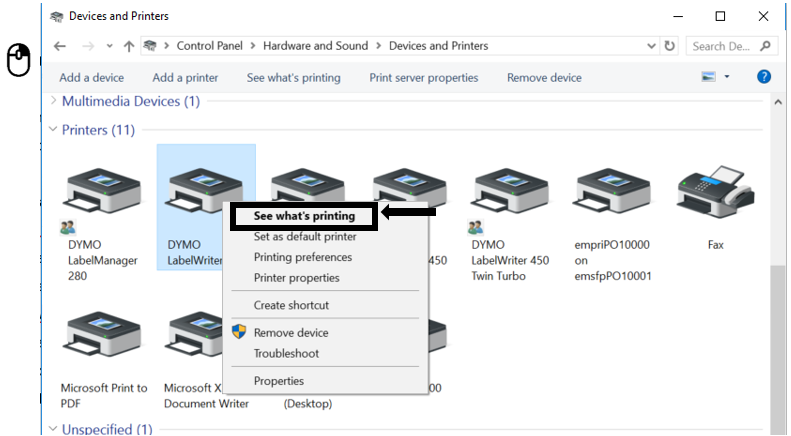
3. Go to Control Panel\Hardware and Sound\Devices and Printers.
4. Right-click on LabelWriter and select See what’s printing.
5. If there is anything in the queue cancel it by selecting 'Cancel All Documents' in 'Printer' tab or right-click on each document and select 'Cancel’.

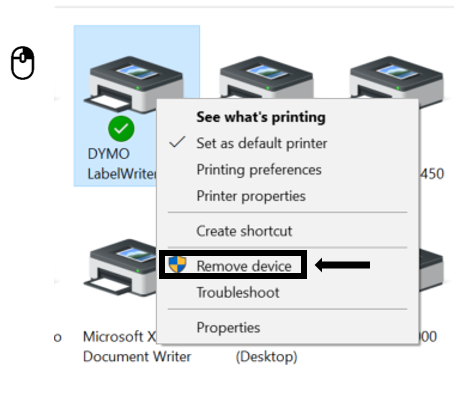
6. Remove LabelWriter from Devices and Printers (Right-click on the LabelWriter listed under the printer heading and select Remove Device). Administrator rights are required.
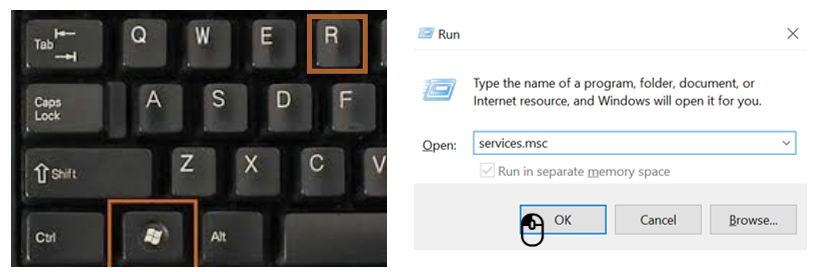
7. Press the Windows key + R and type in services.msc and press Enter or type ‘Services’ in Windows search.
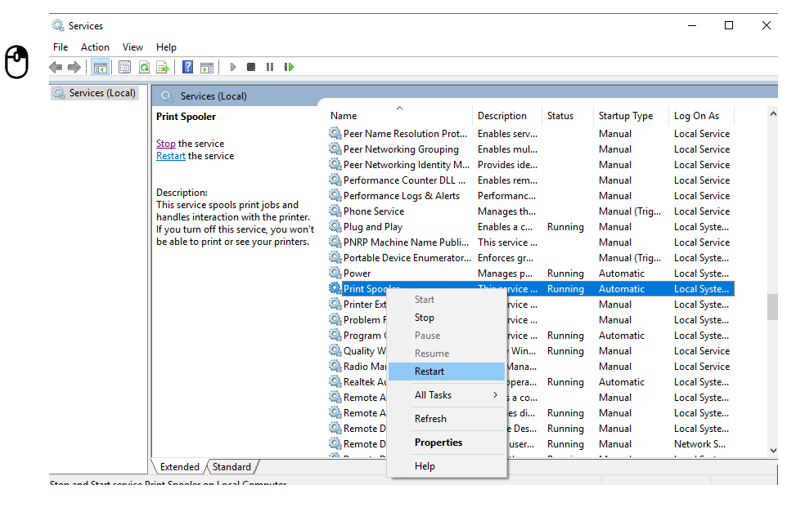
8. Go to Services right-click on Print Spooler and select Restart.
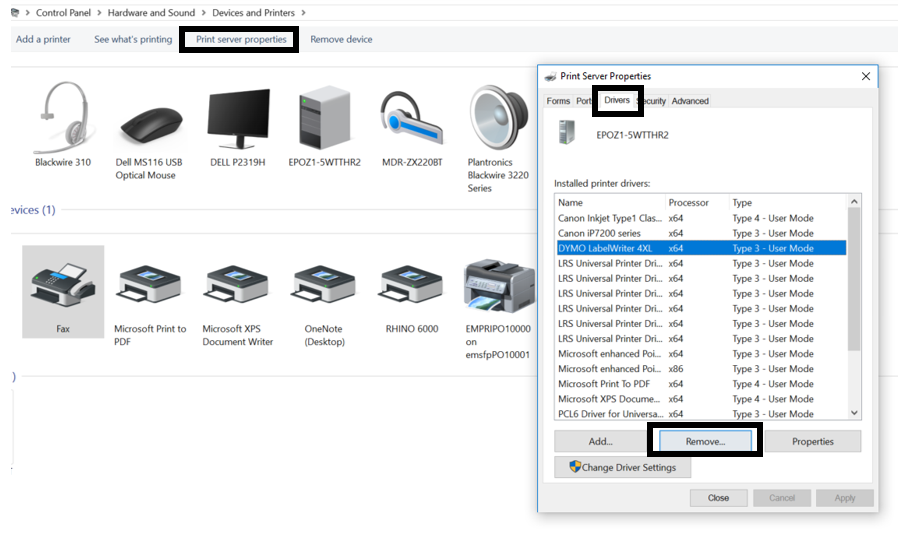
9. Go to Control Panel\Hardware and Sound\Devices and Printers Left-Click once on any printer on the list and select Print server properties.
10. Go to Drivers Tab and select LabelWriter. Remove it using the Remove button on the bottom of the window.
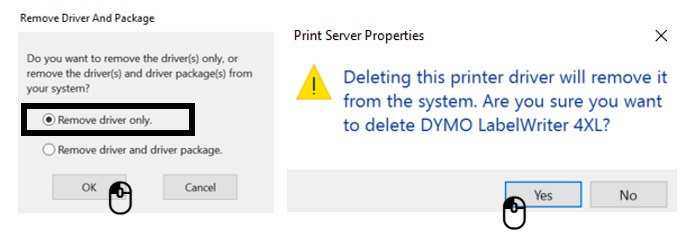
11. Select ‘Remove driver only.’ in the pop-up window and select ‘OK’. Confirm deleting the drivers by selecting ‘Yes”.
12. Re-attach the power cable to the LabelWriter.
13. Re-insert the labels into the feed path. Please see the guide: How to load a label roll in a DYMO LabelWriter (https://www.youtube.com/watch?v=MKJduPG5d4s&t=8s).
14. Re-attach the USB cable (ensure that it is connected to the computer).
15. LabelWriter should be ready to use.